Imagine being able to customize every aspect of a shoe you’d ideally want to wear? The color and the material, both of which can differ for the strap, the interior, the heel and the piping along the side, should you want piping that is and more. The list goes on.
Shoes of Prey is the most unique concept I’ve ever experienced! This luxurious feature of being able to self-design is not for stores or wholesalers, but for consumers — anyone can go to their site, design a shoe and have it shipped directly to their homes.
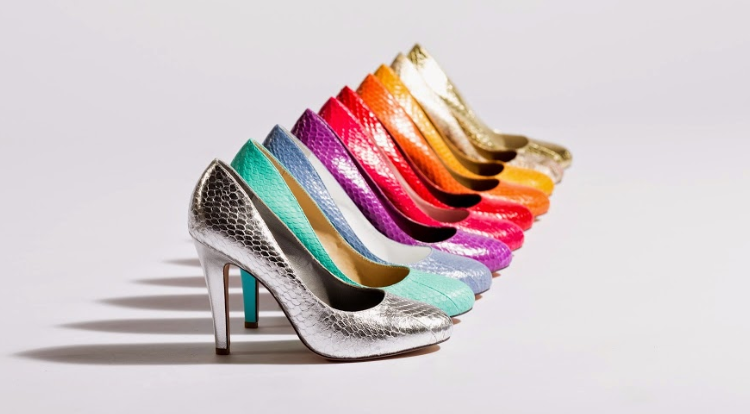
It’s not just wacky vibrant colors, but different materials as well – from silk and material to leather and soft suede. And, once your creative juices get flowing, there’s no telling what you will build!
When I first heard about it, I thought there must be a “catch.” I assumed price had to be one of them, but at only around $200-225, you can get a custom-designed shoe in whatever material and style you want with whatever heel you want.
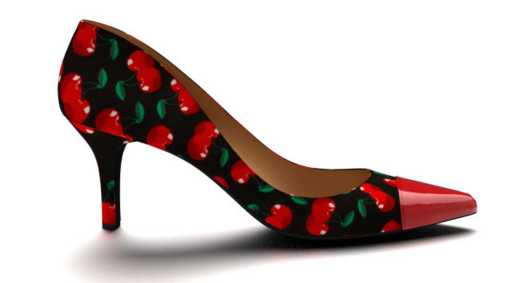
Let me walk you through the process! Truth be told, it was almost as much fun to create and design the shoe as it was receiving it. I’ll start with a few shoe choices that I didn’t end up ordering, so you’ll get an idea of the diversity at Shoes of Prey.
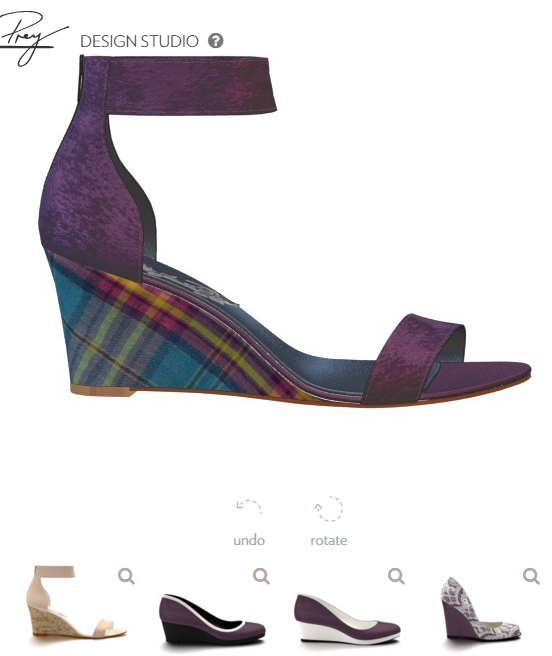
Let’s look at a sandal that I designed and in hindsight, wished I had ordered. It’s oh so lovely and I had so much fun making it. In the beginning, my choices were a little more daring than what I ultimately ended up ordering, which I think is probably normal for a “first time shoe creator”. As a newbie, I went for my favorite colors, dressed shoes up and down, playing with different palettes, textures and styles. Because I do like a heel, but increasingly need a shorter heel given how much I travel, it was empowering to select whatever shoe style I wanted and then select whatever height I wanted. Bravo!!
See the sandal below and how short I made the heel (roughly 2.5 inches tall)! The heel size is where I started, and then I expanded from there, first selecting the material for the base, then the toe strap and finally the heel strap.
In this particular sandal style, I was able to choose a different “finish” for each one. While you can see below that I chose a purple suede for all three, I could just as easily gone with a different finish and color for the ankle strap and the toe strap than what I chose for the base. I decided to select a patchwork design for the heel, which I felt would really stand out at the bottom of a classic dark pair of jeans. Despite how excited I was by my creation, I didn’t order it.
This is part of the newbie process. I’d recommend spending a little time “playing” before you hit the send button — after all, you can save your creation and look at it on another day before you place the order, which is a great feature about the site.
I was also able to select a different finish for the insole and the heel. Below the shoe, you’ll see how the Shoes of Prey back-end system gives me other visual ideas while I’m designing the shoe. Every time I changed something about the design, they gave me new visual options to spark my creativity. See the number on the far right below the above sandal? It’s not a shoe I would typically wear and yet as long as I could reduce the heel size to something reasonable, I’d wear it in a heartbeat and yet, I don’t own anything remotely like it today.
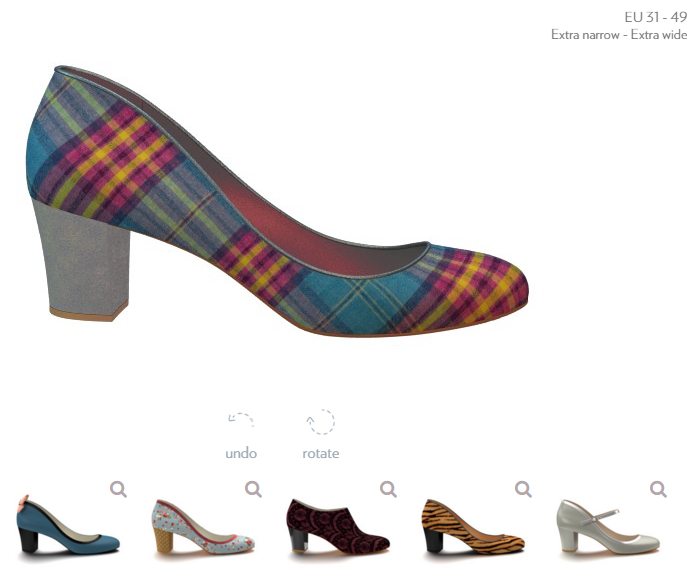
That brings me to the second great thing about going through the Shoes of Prey process — it opens you up to new styles and designs, expanding your wardrobe and your comfort zone. Below is the second shoe I designed and perhaps my favorite of the bunch weeks later. While I still didn’t have the courage to order it, I LOVE this shoe. Why? Because there’s nothing like it in my wardrobe and yet because I couldn’t figure out what dress or skirt I’d wear them with, I kept designing.
That said, this shoe is so zany, quirky and yet elegant and fun, that this “I’m So Sassy” shoe would look fabulous with any stylish pair of jeans or pants. How fabulous right?
But…..I kept designing. I only own a couple pairs of wedges and would love more in my closet since they’re so comfy and go with so many outfits, even on the road. Wedges have never been my style and yet, as an avid traveler, they are oh so comfortable. Take a look at this fun and creative number I put together. Again, I was able to choose the heel height, the material of the heel and the main shoe finish, which in every case, I chose a soft leather because it’s the most durable given how many trips I take. In this case, I went with neutral but fun colors to spice things up, knowing that a Victorian Blue could be dressed up or down, a godsend for any traveler who needs flexibility.
See above at the other variations they presented me with during my “build.” I decided to get a little more daring with a wedge, so I migrated to one with material instead, and went with a solid leather heel as an alternative. BTW, I considered going with fur which would have really brought me out of my comfort zone, however choosing flowers is so out of my norm, that this combo was about as avant guard as I could go for my first shoe design. The question remains…..did I hit send?
Nope, not yet. I was still having too much fun, like a kid in a candy store for the first time or perhaps a better analogy might be a girl who had just been given the biggest collection of jewelry and make-up to play with at her disposal….for the first time.
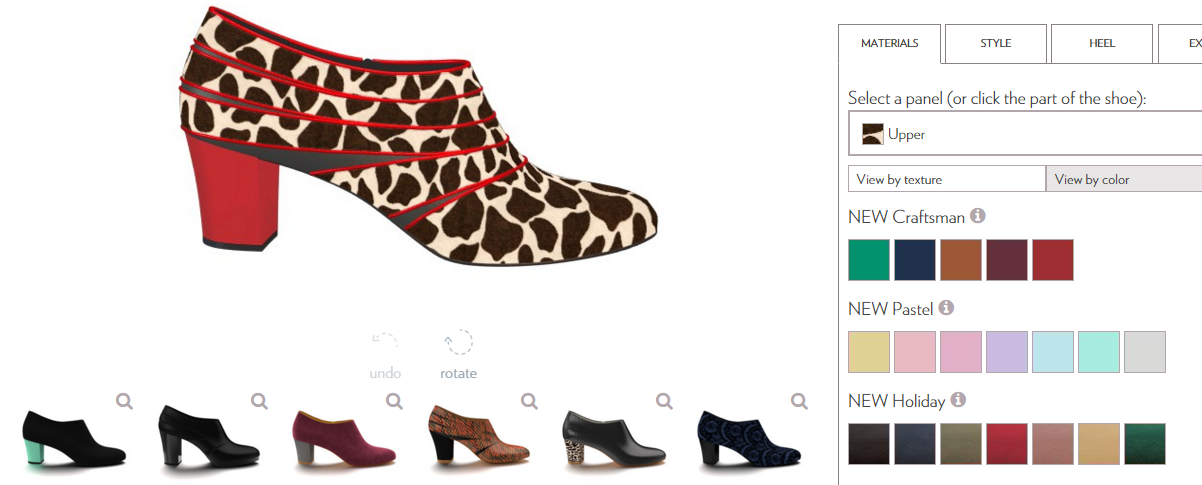
At this juncture, I decided to revert to a shoe type that I was more familiar with and wore all the time. A safe choice perhaps, although I stepped out of that safety zone with my palette choices. First I went with a bright red soft leather heel and gave the main bootie a little leopard fur for fun. Behind the leopard, I could also choose a color or texture, so I went with a soft muted gray to give the overall bootie a little more definition.
The cool thing about the process is that it doesn’t matter whether you’re good at it or not, but whether you’re having fun along the way. Whatever colors and fabrics you love, you can order! And, you can change it anytime before you order that final piece of art, for that is precisely what a Shoes of Prey creation is, a work of art…..YOUR work of ART!
I created a few variations from this style as you can see below. Note that the price is a little higher for the shoe below because I went with a bunch of extras like piping, a higher end finish for the insole and so on, which is all purely optional.
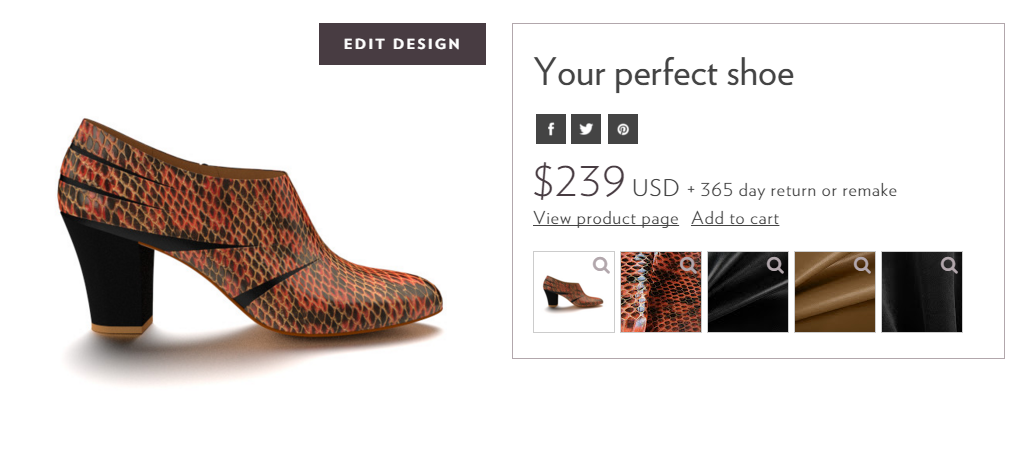
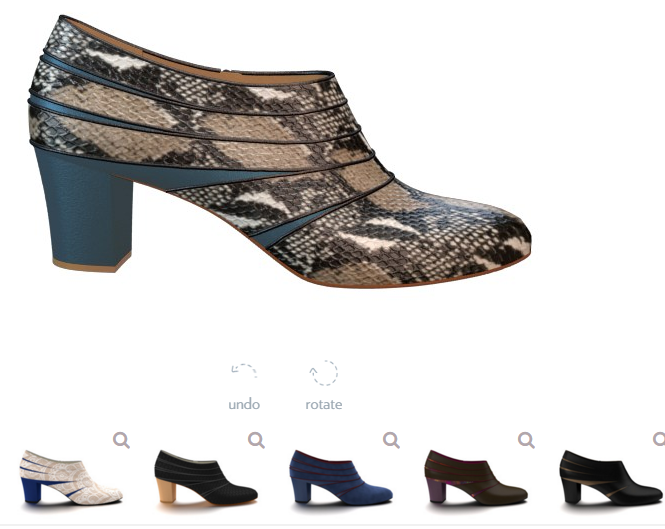
As the days marched on and I kept revisiting the site, I ended up with a much more conservative design — see below. What was new for me here is a shoe with an authentic snakeskin finish (for the main exterior, I went with a dark brown although there were a variety of two tone color options in snakeskin as well) and absolutely loved my final result. Elegant, classic and such neutral earthy colors that I could wear them with jeans or a dressy pair of slacks.
It’s so customizable that as you go through the process, you find it hard to believe they can create a shoe YOU designed to YOUR specs. It’s simple really and as easy as choosing images, color patterns and styles just like you’d move things around on a kid’s board game — it’s that easy.
Here’s How it Works!
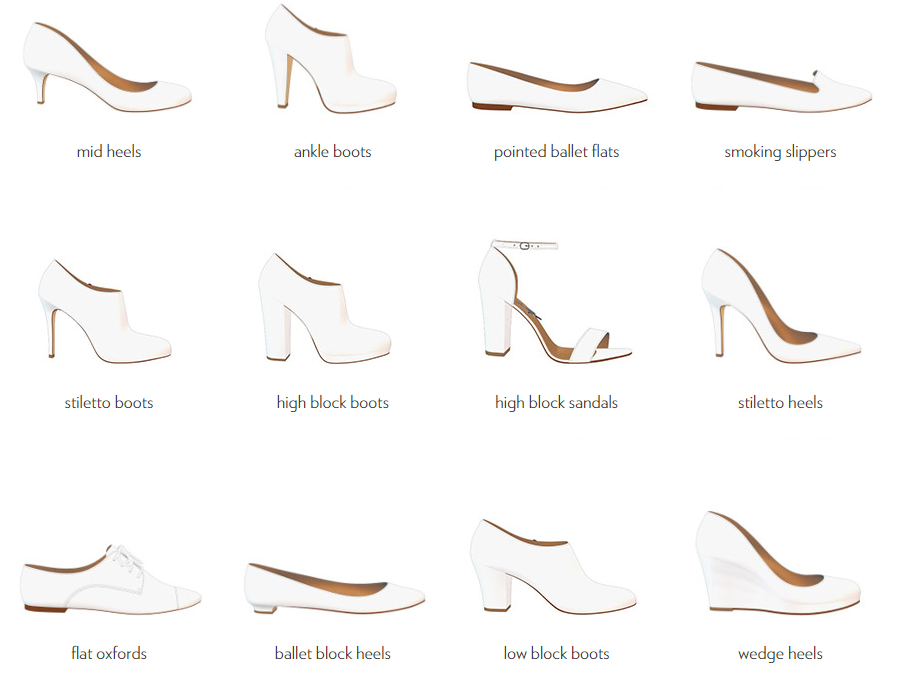
Step 1 — Shoe Style
Here, you choose the style of shoe you want as your base design. From mid-heels, ankle boots, ballet flats, smoking slippers to wedges, sandals and stilettos, they have them all.
Step 2 — Heel Height
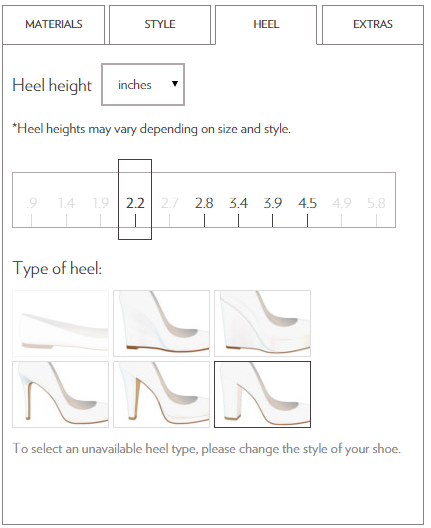
There’s a simple widget that allows you to choose your height after you make your shoe type selection. For women who are on their feet all day, it doesn’t get much better than this!
Step 3: Design Various Parts of Your Shoe
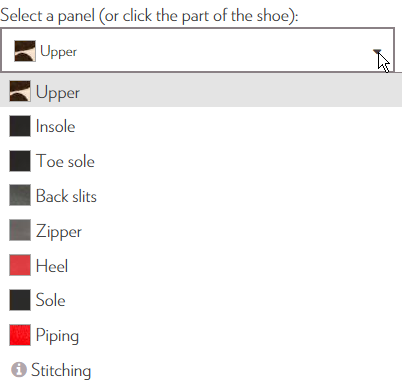
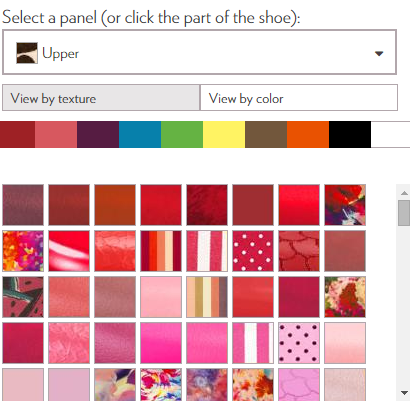
Here, it starts to get really fun as you’re given a menu to choose different parts of the shoe and there’s no particular order. I started with the upper (see below) and used different “palettes” to choose the texture, color, type of material and so on. Note that you can customize every part of the shoe, from the upper, insole, toe sole, back slits, zipper, heel, sole and piping. If you wanted to get a little crazy (above and beyond the classic creative in you), then the sky is the limit. Want leopard upper, red back slits and a purple heel? Go for it. Your mood sets the style and artistic creation you’ll ultimately end up with.
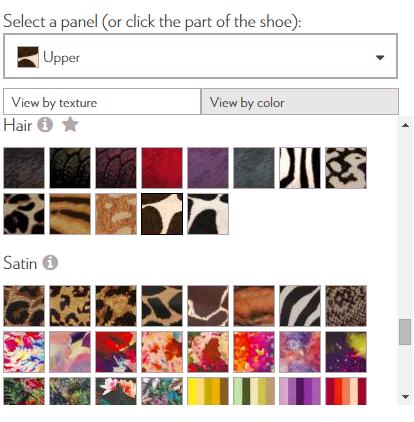
Below, is an idea of the menu selection process when I first started playing around with the sandals I first created — it was all so easy for me to just mix and max! Note how many choices there are, from hair, snakeskin, patent leather, soft leather, material, silk material and more.
Step 4: The Final Touches
After you design the exterior of your shoe, which includes things like the strap, the heel, the insole color and texture and so on, you can also choose piping around the edges or woven into the main shoe (see below). The final touches add to the price but it’s not significant, so choose what you like but try to venture out of your comfort zone.
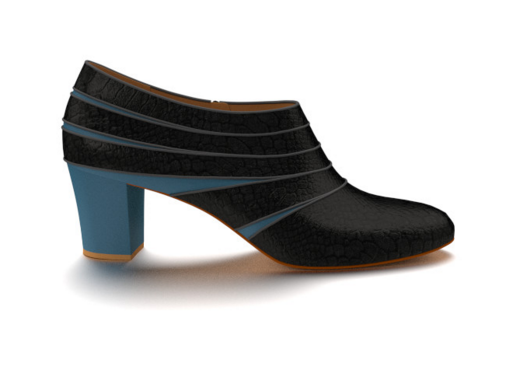
Below is a variation of my original more conservative snakeskin bootie above, but with a two tone finish, keeping the same soft blue leather for the heel and the under layer. I went with a dark brown piping and in the end a black bottom. (they offer tan and black).
This classic yet creatively designed shoe is the one I ended up ordering and was extremely happy with the final result. While I still marvel at the gorgeous and fun textured wedges and sandals I initially created on the site, this neutral colored bootie will get tons more wear. As I toned down my style and colors, the ever so clever Shoes of Prey recommendation engine delivered more conservative variations below my design! Fascinating right?
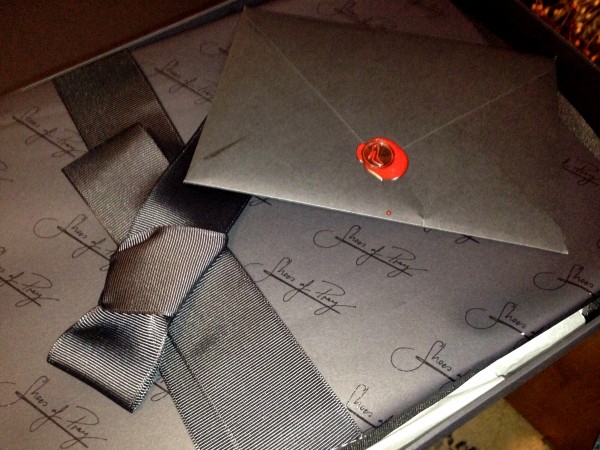
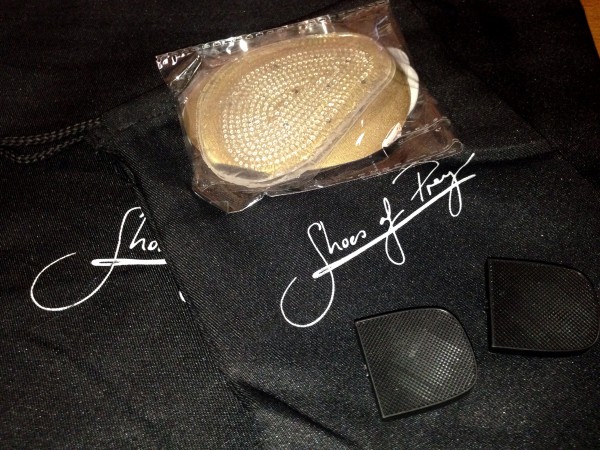
When you receive your fabulous hand-created shoe, you can’t help but notice how much they pay attention to the packaging. The box and additional frills are luxurious and elegant, so much so that I felt like I was in Europe buying a shoe at a high end boutique, receiving the kind of service I got in Milan and Paris twenty years ago and for only around $200-250 a pop. They were beautifully wrapped with a personalized note, came complete with soft shoe bags for packing (travelers will love this) and extra heels, which frankly given how hard I am on my heels, was a godsend. Travelers too will love this feature, a classy fine touch that made me feel “worth it.”
In the package, there were a few colorful post cards and one made me laugh out loud. It said, “I’m a Shoeaholic and I don’t need Help!” There’s not a woman I know, even the tomboys and most adventurist among my female tribe, who doesn’t love shoes, so many of you will resonate. Why say no?
One thing worth noting however is that their sizing tends to be a little on the small size. I’m normally an 8.5-9 American or 39 to 39.5 European and had to go with a 40.5 in the end. That said, I did wind up with a bootie so if you’re going with a sandal, that may not be as big of an issue, but do consider padding your sizing a bit to be on the safe side. More details can be found at http://www.shoesofprey.com. We love love love this brand!

Renee Blodgett is the founder of We Blog the World. The site combines the magic of an online culture and travel magazine with a global blog network and has contributors from every continent in the world. Having lived in 10 countries and explored nearly 80, she is an avid traveler, and a lover, observer and participant in cultural diversity.
She is also the CEO and founder of Magic Sauce Media, a new media services consultancy focused on viral marketing, social media, branding, events and PR. For over 20 years, she has helped companies from 12 countries get traction in the market. Known for her global and organic approach to product and corporate launches, Renee practices what she pitches and as an active user of social media, she helps clients navigate digital waters from around the world. Renee has been blogging for over 16 years and regularly writes on her personal blog Down the Avenue, Huffington Post, BlogHer, We Blog the World and other sites. She was ranked #12 Social Media Influencer by Forbes Magazine and is listed as a new media influencer and game changer on various sites and books on the new media revolution. In 2013, she was listed as the 6th most influential woman in social media by Forbes Magazine on a Top 20 List.
Her passion for art, storytelling and photography led to the launch of Magic Sauce Photography, which is a visual extension of her writing, the result of which has led to producing six photo books: Galapagos Islands, London, South Africa, Rome, Urbanization and Ecuador.
Renee is also the co-founder of Traveling Geeks, an initiative that brings entrepreneurs, thought leaders, bloggers, creators, curators and influencers to other countries to share and learn from peers, governments, corporations, and the general public in order to educate, share, evaluate, and promote innovative technologies.

